Migrate your domain email from Zoho to FastMail
Update: One referrenced post is now available. How to backup your Zoho emails.
This post has pictures for your edutainment!
For a long time I’ve wanted to migrate my email to FastMail. I’ve heard great things about them, and the whole “You pay us for the product” rather than “You are the product” thing is pretty neat too. So today, when I found out my primary email address, which is hosted at Zoho, wasn’t being synced, I decided to switch.
First, a WTF?
I must admit I wouldn’t have had the impetus to switch if there were no glaring problems with my email setup. Luckily, Zoho (or Gmail, not sure which one), fixed this “problem” by not syncing my email. Gmail also tells you the error for why email is not being synced, and it gave me this lovely reason:

That got a pretty big eyebrow raise from me, and mention of terrorist’s elipses is enough of … something … to encourage me to try a new thing.
So what do you actually do?
1. Sign up
Signing up for FastMail is a good place to start (here’s a referral link for you, and if you don’t want that, here’s a regular link)
To complete signing up, click on the “Pricing & Signup” button near the top right. There, you fill out your name and such, as well as select an email address with FastMail, using one of their many domain options. Don’t worry too much about this, as you’ll eventually be adding your own domain’s email.
2. Forward your current email address
You’ll want to do this first before you migrate your email, so that you won’t miss anything. You may get some duplicates, but that’s better than missing emails.
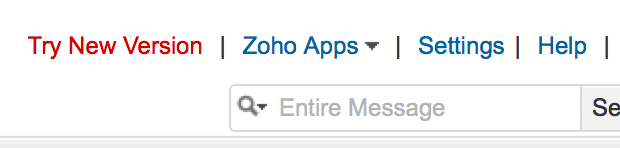
Go to Zoho and click on “Settings” in the top right.
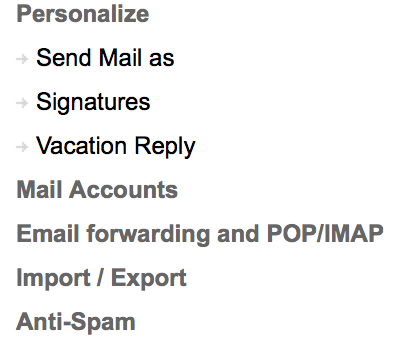
Then on the left, click on “Email forwarding and POP/IMAP”.
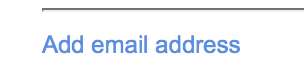
In the main window, under “Email Forwarding”, we can add an email address. Click on “Add email address”
Adding an email address requires confirmation from your new FastMail address. You’ll have to navigate to your new FastMail mail page. If you’re still in the trial period at FastMail (like I was), this means you need to authenticate with a phone number. Just click the link in the email, authenticate, and then the actual email will be displayed.
Now that you have the email, you can click on “verify” by the email in Zoho, enter the code from your FastMail email, and email forwarding will be enabled.
On to the next step!
3. Migrate your current email
After you’ve done that and proved you’re not a robot (life is hard for robots these days), you can get started on migrating all your current zoho email to this new email account. FastMail’s own documentation on how to do this is pretty awesome, and even links to the exact place you need to go to get started, which I really wish more documentation did, it’s so helpful. So check that documentation out.
Fair warning, I did this, and it successfully ported about 75% of the email. From what I can tell, it only missed older emails, not the most recent ones. This is hard to confirm, though, because Zoho’s email interface doesn’t make it easy to see large groups of emails, where as FastMail’s interface just allows you to keep scrolling down and loads emails as you see them.
Regardless, I recommend exporting and downloading all of your email through Zoho’s interface. Instructions are now here.
4. Setup your domain on FastMail
FastMail call’s this a “Virtual Domain”, and you can find the option under “Advanced”, which is all located in the drop down menu in the top left corner. They also have great documentation for this and the next step, located here, but I’ll also go over it now.
Scroll down to the “Domain” section, and add in the bare version of your domain

You’ll probably want to leave the “Subdomain?” section as a Yes.
It allows you to use (for example) mybank@me.example.com as an email address, which will route to me+mybank@example.com.
This lets you use the + email even when sites don’t allow that.
Here’s a link to what the + is all about.
Now it’s time to setup our domain to actually use FastMail.
5. Setup your domain MX records
Don’t worry too much if you forget this step, because FastMail will remind you about it, by sending you an email telling you what to do. And mentioned before, their documentation is pretty good, but I’ll cover it below.
This assumes you’ve registered your domain somewhere and are purely using FastMail for email. Personally, I use NearlyFreeSpeech.NET (not an affiliate link)
You’ll need to go to your domain records, and set the MX records to what FastMail wants.
At the time of writing, these were the domains that needed to be set:

But make sure to click here to ensure you have the updated information. Also, the priorities that they mention (10 and 20) need to be before your MX record. When I was setting this up on NearlyFreeSpeech.NET, my MX records ended up looking exactly like this:
10 in1-smtp.messagingengine.com.
20 in2-smtp.messagingengine.com.
That . at the end is necessary, but some domain registrars add it themselves.
NearlyFreeSpeech.NET does not, giving you a little more freedom but also responsibility.
There are some more advanced things FastMail recommends that you do. I won’t cover them here, but I will cover them in a later post, and link it here when it’s done.
6. Configure a FastMail “personality” to send email
This time you have to go to the advanced settings and then “Personalities”.
In the top left there is a button you can click to “Create New Personality”
Go ahead and add your-name@example.com to both the “Display name” and “Email address” sections.
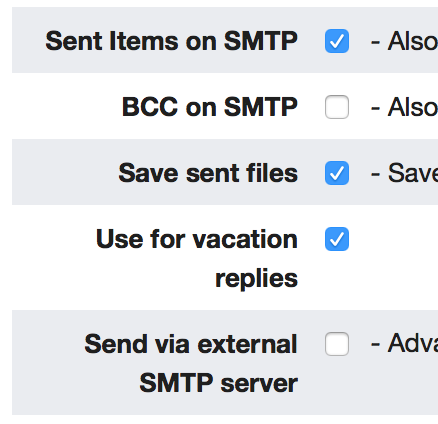
Scroll down a bit and make the section with checkboxes look like this:
At the very bottom, click “Save personality”, then go back to the top, look to the right, and click the “Make default Personality” button as well.
7. Test it! (though maybe later)
So, it takes some time for the MX records to propogate. But if you wait a few hours, that should be good.
Once things have changed (check them using MXToolBox, which is recommended by FastMail) go ahead and send an email from this account to another email you have. Make sure to select the personality you set up earlier as your sending address, otherwise you’re just testing to see if FastMail has configured their own email servers.
If it works, congratulations! You now have your domain’s email running on FastMail.
Final Notes
Seriously do backup your email from Zoho (or wherever it was before). As mentioned before, FastMail didn’t get all of the email when it attempted the transfer.
Again, a link will be posted here and higher up the page when I’ve written about backing up emails hosted at Zoho.